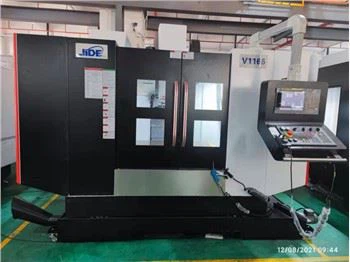
Hey there! As a supplier of Cnc Horizontal Lathes, I often get asked about how to install and remove the chuck on these machines. It's a crucial skill for anyone working with these lathes, whether you're a seasoned pro or just starting out. So, let's dive right in and break down the process step by step.
Why It Matters
First off, you might be wondering why it's so important to know how to install and remove the chuck. Well, different jobs require different types of chucks. For example, if you're doing CNC turning, you might need a specific chuck that can hold the workpiece securely during the turning process. And sometimes, you'll need to switch chucks to accommodate different workpiece sizes or shapes. So, being able to install and remove the chuck quickly and safely is key to keeping your production running smoothly.
Tools You'll Need
Before we start, let's gather the tools we'll need. You'll typically need a chuck wrench, a dial indicator, a torque wrench, and some cleaning supplies. The chuck wrench is used to tighten and loosen the chuck bolts. The dial indicator helps you align the chuck properly, and the torque wrench ensures that you tighten the bolts to the correct specification. The cleaning supplies are for cleaning the spindle nose and the chuck mounting surface to ensure a good fit.
Installing the Chuck
Step 1: Prepare the Spindle and Chuck
The first thing you need to do is clean the spindle nose and the chuck mounting surface. Use a clean cloth and some solvent to remove any dirt, debris, or grease. This is important because any contaminants can affect the alignment and performance of the chuck. Once they're clean, inspect the surfaces for any damage or wear. If you notice any issues, it's best to address them before proceeding.
Step 2: Mount the Chuck on the Spindle
Carefully place the chuck on the spindle nose. Make sure it's properly aligned with the spindle. You can use the dial indicator to check the alignment. Place the dial indicator on the chuck face and rotate the spindle slowly. The indicator should show minimal movement. If there's a significant amount of runout, you'll need to adjust the chuck position until it's within the acceptable range.
Step 3: Tighten the Chuck Bolts
Once the chuck is properly aligned, it's time to tighten the chuck bolts. Use the chuck wrench to hand-tighten the bolts initially. Then, use the torque wrench to tighten them to the manufacturer's recommended torque specification. Over-tightening the bolts can damage the chuck or the spindle, while under-tightening can cause the chuck to come loose during operation, which is extremely dangerous.
Step 4: Check the Chuck Runout Again
After tightening the bolts, check the chuck runout again using the dial indicator. This is to ensure that the tightening process hasn't affected the alignment. If the runout is still within the acceptable range, you're good to go. If not, you may need to loosen the bolts slightly and readjust the chuck position.


Removing the Chuck
Step 1: Prepare the Machine
Before removing the chuck, make sure the machine is turned off and unplugged. This is a safety precaution to prevent any accidental startup. Also, remove any workpieces or tools from the chuck.
Step 2: Loosen the Chuck Bolts
Use the chuck wrench to loosen the chuck bolts. Start by loosening them a little bit at a time, going around the chuck in a star pattern. This helps to prevent the chuck from binding or getting stuck. Once the bolts are loose enough, you can remove them completely.
Step 3: Remove the Chuck from the Spindle
Carefully lift the chuck off the spindle. It can be heavy, so make sure you have a good grip and use proper lifting techniques. If the chuck is stuck, you may need to use a soft mallet to gently tap it loose. Be careful not to damage the spindle or the chuck during this process.
Step 4: Clean and Store the Chuck
Once the chuck is removed, clean it again using the cleaning supplies. This helps to prevent corrosion and keep the chuck in good condition. Then, store the chuck in a safe and dry place until it's needed again.
Tips and Tricks
- Always follow the manufacturer's instructions when installing and removing the chuck. Different chucks and lathes may have specific requirements.
- Keep your tools in good condition. A worn-out chuck wrench or torque wrench can lead to improper tightening and alignment.
- If you're having trouble aligning the chuck, don't hesitate to ask for help. It's better to get it right the first time than to risk damaging the machine or the workpiece.
Conclusion
Installing and removing the chuck on a Cnc Horizontal Lathe is a relatively straightforward process, but it requires attention to detail and the right tools. By following these steps and tips, you can ensure that your chuck is installed correctly and safely, and that you can switch chucks quickly and easily when needed.
If you're in the market for a 2 Axis Cnc Lathe or a Horizontal Cnc Lathe Machine, we're here to help. Our team of experts can provide you with the right advice and support to meet your needs. Whether you're a small workshop or a large manufacturing facility, we have the perfect solution for you. So, don't hesitate to reach out and start a conversation about your procurement needs.
References
- Manufacturer's manual for the Cnc Horizontal Lathe
- Industry best practices for chuck installation and removal